


Calibrating the Machine – Pathfinder v2
Please note that this process applies to Pathfinders running version 2 software only. This does not apply to a Pathfinder running version 4 software. Contact Support for help with version 4 calibration.
Pathfinder’s Administrative Tools includes a Calibrate Machine function. When Pathfinder requires calibration, you will see “Waiting for Calibration Data” at the bottom of the screen.
To start the calibration process, click the Tools button and select Calibrate Machine. From this screen, you can calibrate the Bending Beam Position, Clamping Beam Position, Clamping Beam Pressure and Radius Adjustment.
See below for more information.
Referencing Absolute Encoders
Some machines have an absolute encoder on the Bending Beam, Clamping Beam and/or Radius Adjustment. Since the encoder is absolute, it does not need to be “reset” based on a switch. However, it does need to track all of the range of motion of the axis to which it is tied, with values between zero and its maximum.
If your machine has an absolute encoder on any of its axes, your calibration screen for each axis will have a Reference Encoder button. Pressing this button will reset the encoder to a value in the middle of its range of motion. If this button is not present, there is no encoder to reference.
Note: It is important that you reference the absolute encoder before continuing to calibrate each axis. Failure to do so could result in inaccurate calibration.
To reference an absolute encoder, move the axis to a position in the middle of its range of motion. Once there, click Reference Encoder on the calibration screen. This will reset the encoder to a value in the middle of its valid range. Then, when calibrating, you ensure that all of the feedback measurements that you are recording are above zero.
Please note that if you press Reference Encoder when the axis has already been calibrated, all calibration data for that axis is removed.
Clamping Beam Pressure (optional)
Clamping beam position must only be calibrated on machines with pressure transducer feedback devices. Calibrating the clamping beam pressure requires taking measurements across the total range of the clamping beam’s motion. To measure the clamping beam pressure, watch the pressure input reading in the top right of the screen.
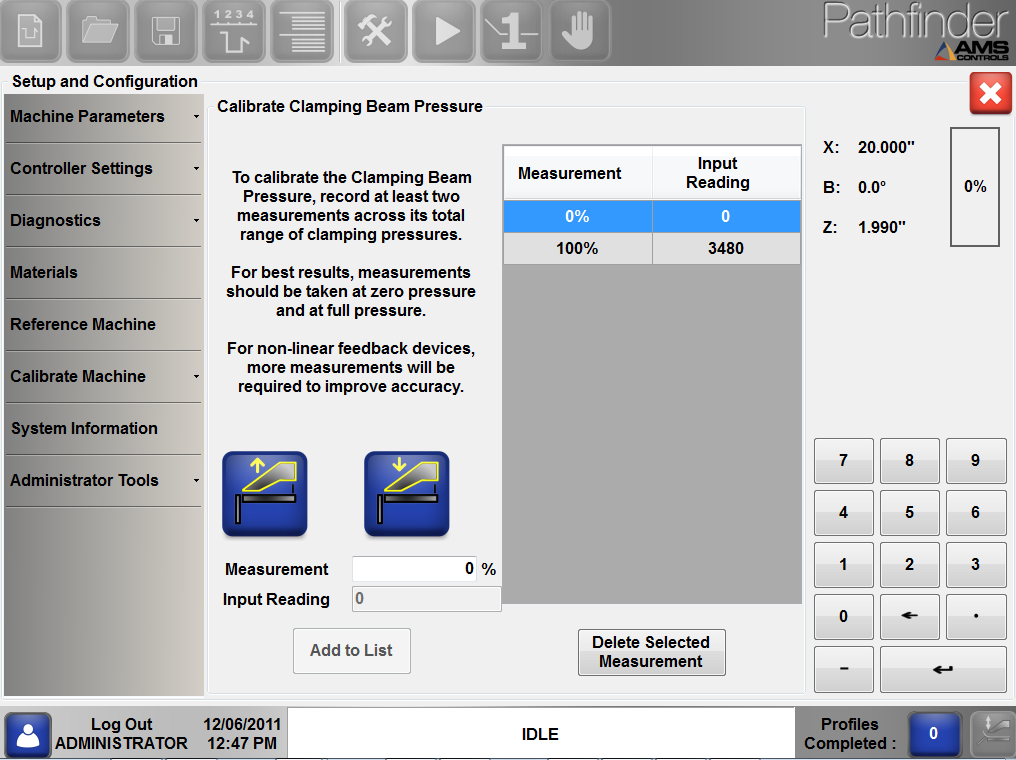
Clamping beam pressure calibration screen
Jog the clamping beam closed, until it is touching the table but not dramatically changing the input reading, then enter the pressure as 0% into the Measurement box, press Enter and select Add to List. Jog the clamping beam down as far as it will go, then enter the pressure as 100% into the Measurement box, press Enter and select Add to List.
Clamping Beam Position
Calibrating the clamping beam position requires taking measurements across the total range of the clamping beam’s motion. Use a caliper to measure the angle of the clamping beam.
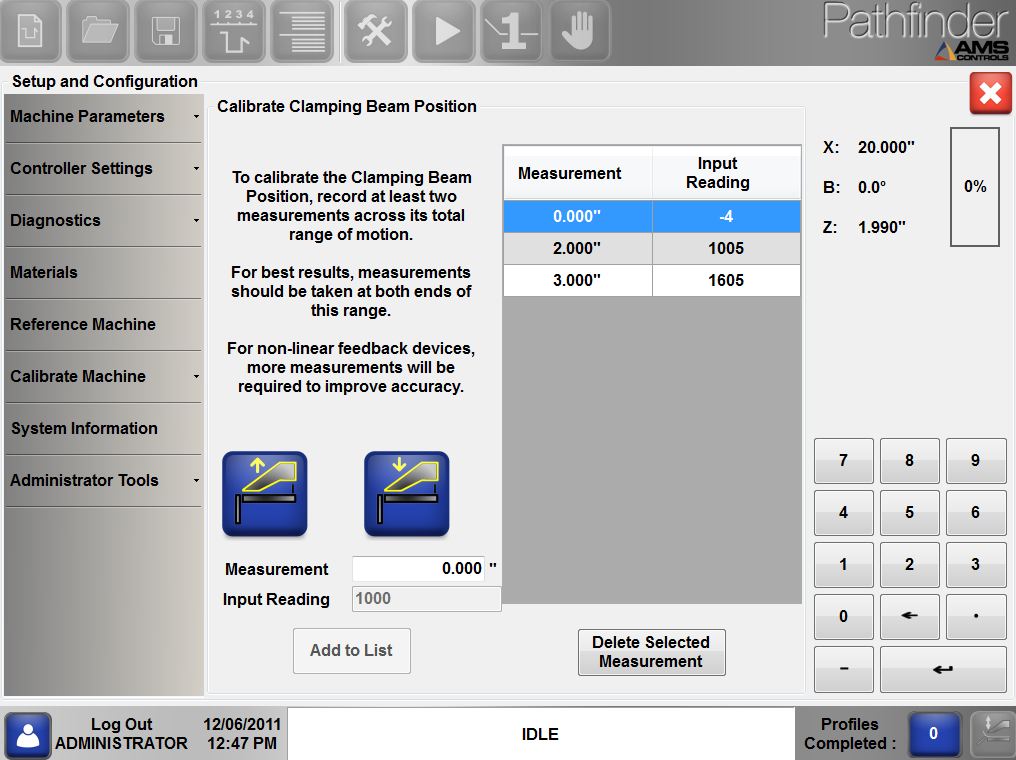
Clamping beam calibration screen
Jog the clamping beam to a position, then enter the measured position into the Measurement box, press Enter and select Add to List. Repeat this for several measurements all along the clamping beam’s range of motion. Feeler gauges may be helpful near the fully closed position. On machines with eccentric type clamping mechanisms, it is important to get many readings below the safety height for best results.
Remember, the more measurements you take, the more accurate the position.
Radius Adjustment Position (optional)
If you are using a folding machine that allows for Radius Adjustment, then this option will appear under Calibrate Machine.
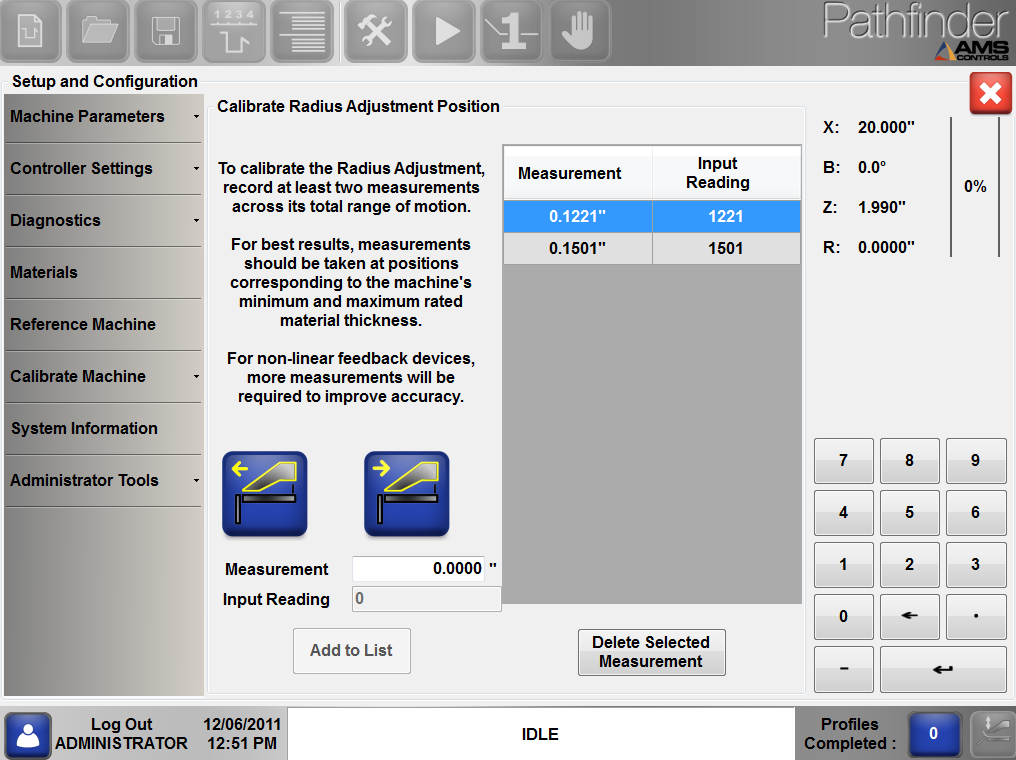
Calibrating Radius Adjustment
To calibrate the Radius Adjustment, the clamp must be open to a position greater than one inch. Jog the clamping beam as far away from the bending beam as possible and calibrate that to the maximum rating. Enter that measurement into the Measurement box, hit Enter and click Add to List to add the calibration data.
Then, jog the clamping beam as close to the bending beam as possible and calibrate that to the minimum rating. Enter that measurement into the Measurement box, hit Enter and click Add to List to add this data to the calibration table.
Bending Beam Position
Calibrating the bending beam position requires taking measurements across the total range of the bending beam’s motion. To measure the angle of the bending beam, use a magnetic inclinometer (available through woodworking stores).

Bending Beam Calibration Screen
Jog the bending beam to a position and enter the measurement into the Measurement box and press Enter. Then select Add to List to add the measurement to the table. Repeat this for several angle positions, including both the highest and lowest range of motion for your particular machine.
Take the angle measurement for every 20 to 25 degrees for the most accurate calibration.
Note: Calibration measurements do not have to be taken in order. For example, you can take a measurement at 45°, then 100°, then jog back to 10° and take a measurement. The order of these measurements does not matter.
Remember, the more measurements you take, the more accurate the position.
Re-referencing the Clamping Beam
If the machine has a safety stop on the clamping beam, it is important to re-reference the clamping beam after calibration. This will ensure that the safety stop position is accurate. If your machine does not have a safety stop on the clamping beam, you can skip this step.
Return to the Reference Machine screen and select the Clamping Beam Down button until it is fully clamped. Follow any instructions that are shown on the screen. Once the Clamping Beam has been re-referenced, the machine will be ready to use.
