


Eclipse Pro Wallboard Andon App Setup
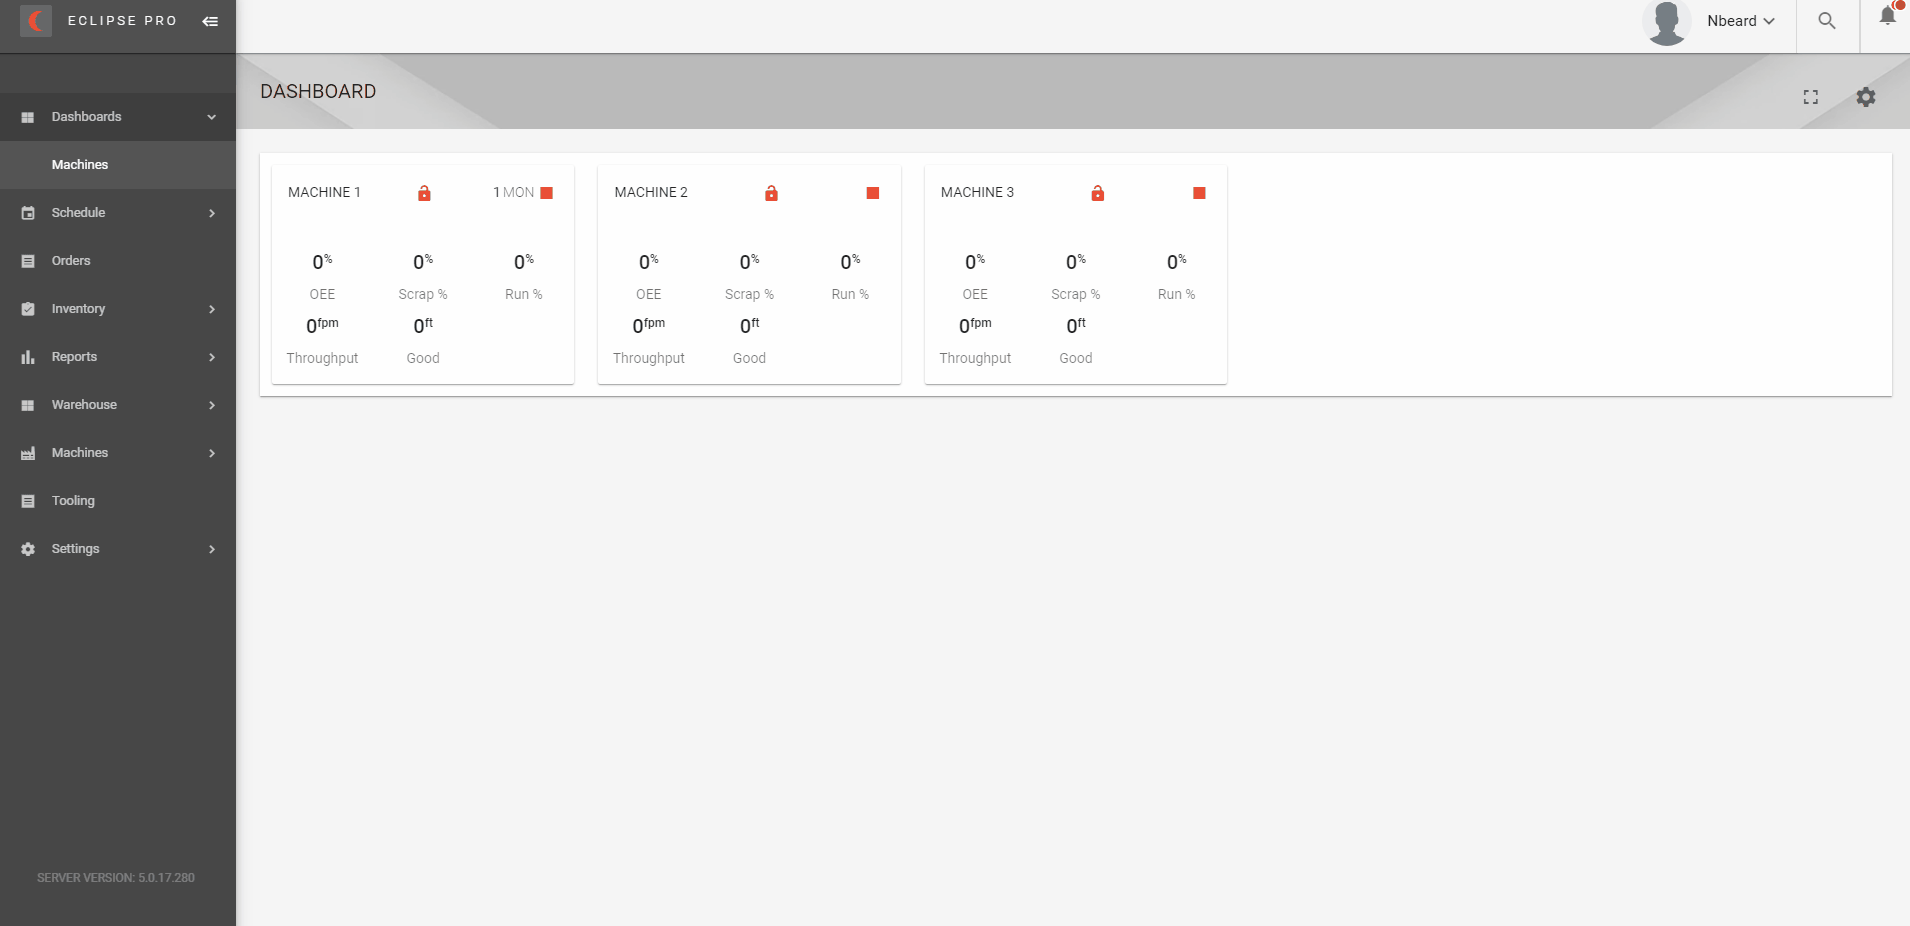
The Eclipse Pro Wallboard Andon display is a simple and consistent mechanism for communicating production status information. These displays provide real-time feedback tailored to the needs of Customer Service representatives, Schedulers, Line Operators, Floor Supervisors, and even Senior Management. The Line Operators can view upcoming orders, upcoming coil changes, and other helpful information to maximize productivity. Customer Service representatives and Schedulers will know the progress of Orders and be able to quickly react to changing customer needs. Supervisors on the floor and Senior Management in the office will have at-a-glance Line and Production status: What lines are running? What lines are halted? Why?
The Wallboard Andon provides accurate production status, real-time metrics, and other data from the shop floor that can prove invaluable when managing and optimizing production. Even better, you can manage all devices and update the dashboard data from the palm of your hand while on the go or from the comfort of your own desk. Please see the following guide on how to get started.
Navigation
To access the Wallboard, expand the Settings within the Eclipse Pro navigation pane and then select Wallboard.
Setup
Before you begin
Ensure that the device you plan to set up on the Wallboard is network-accessible and on the same network as your Eclipse Pro PC. In order to establish a connection, Eclipse Pro will need to be able to connect to the device. If you are unsure if your devices are on the same network, please check in with your IT before you continue.
Step 1 – Adding a device to the Wallboard
From your remote device (TV, computer, firestick, chrome box, etc.), launch a web browser and navigate to the following URL:
http://EclipseProComputerName:8080/app/wallboard/index.html
Please note that the portion bold and italicized will be your individual Eclipse Pro computer name. If you are unsure of how to locate your Eclipse Pro computer name, please see the following Microsoft article.
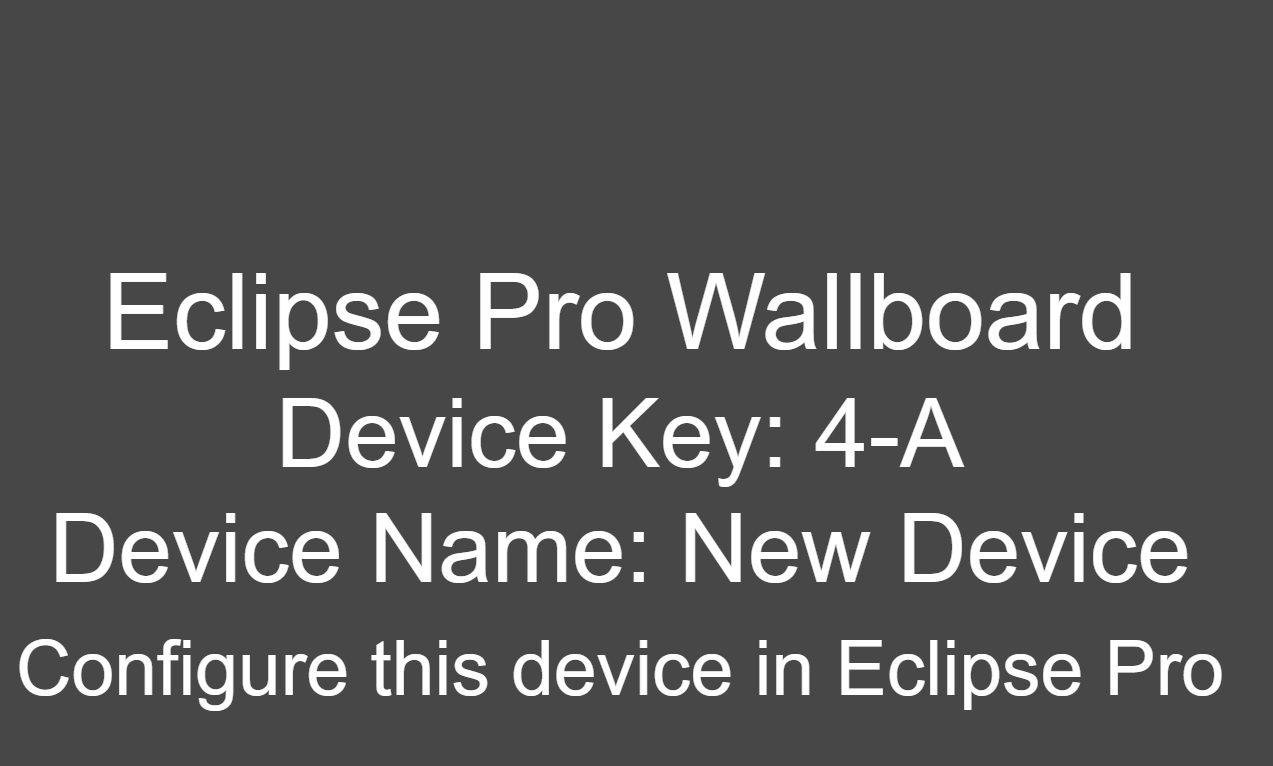
Once the URL is launched, Eclipse Pro will assign the remote device a Device Key. The Device Key is a unique identifier that Eclipse Pro will utilize for your specific remote device. The Device Key will not change after your initial setup unless you delete and re-add the Wallboard device to Eclipse Pro.
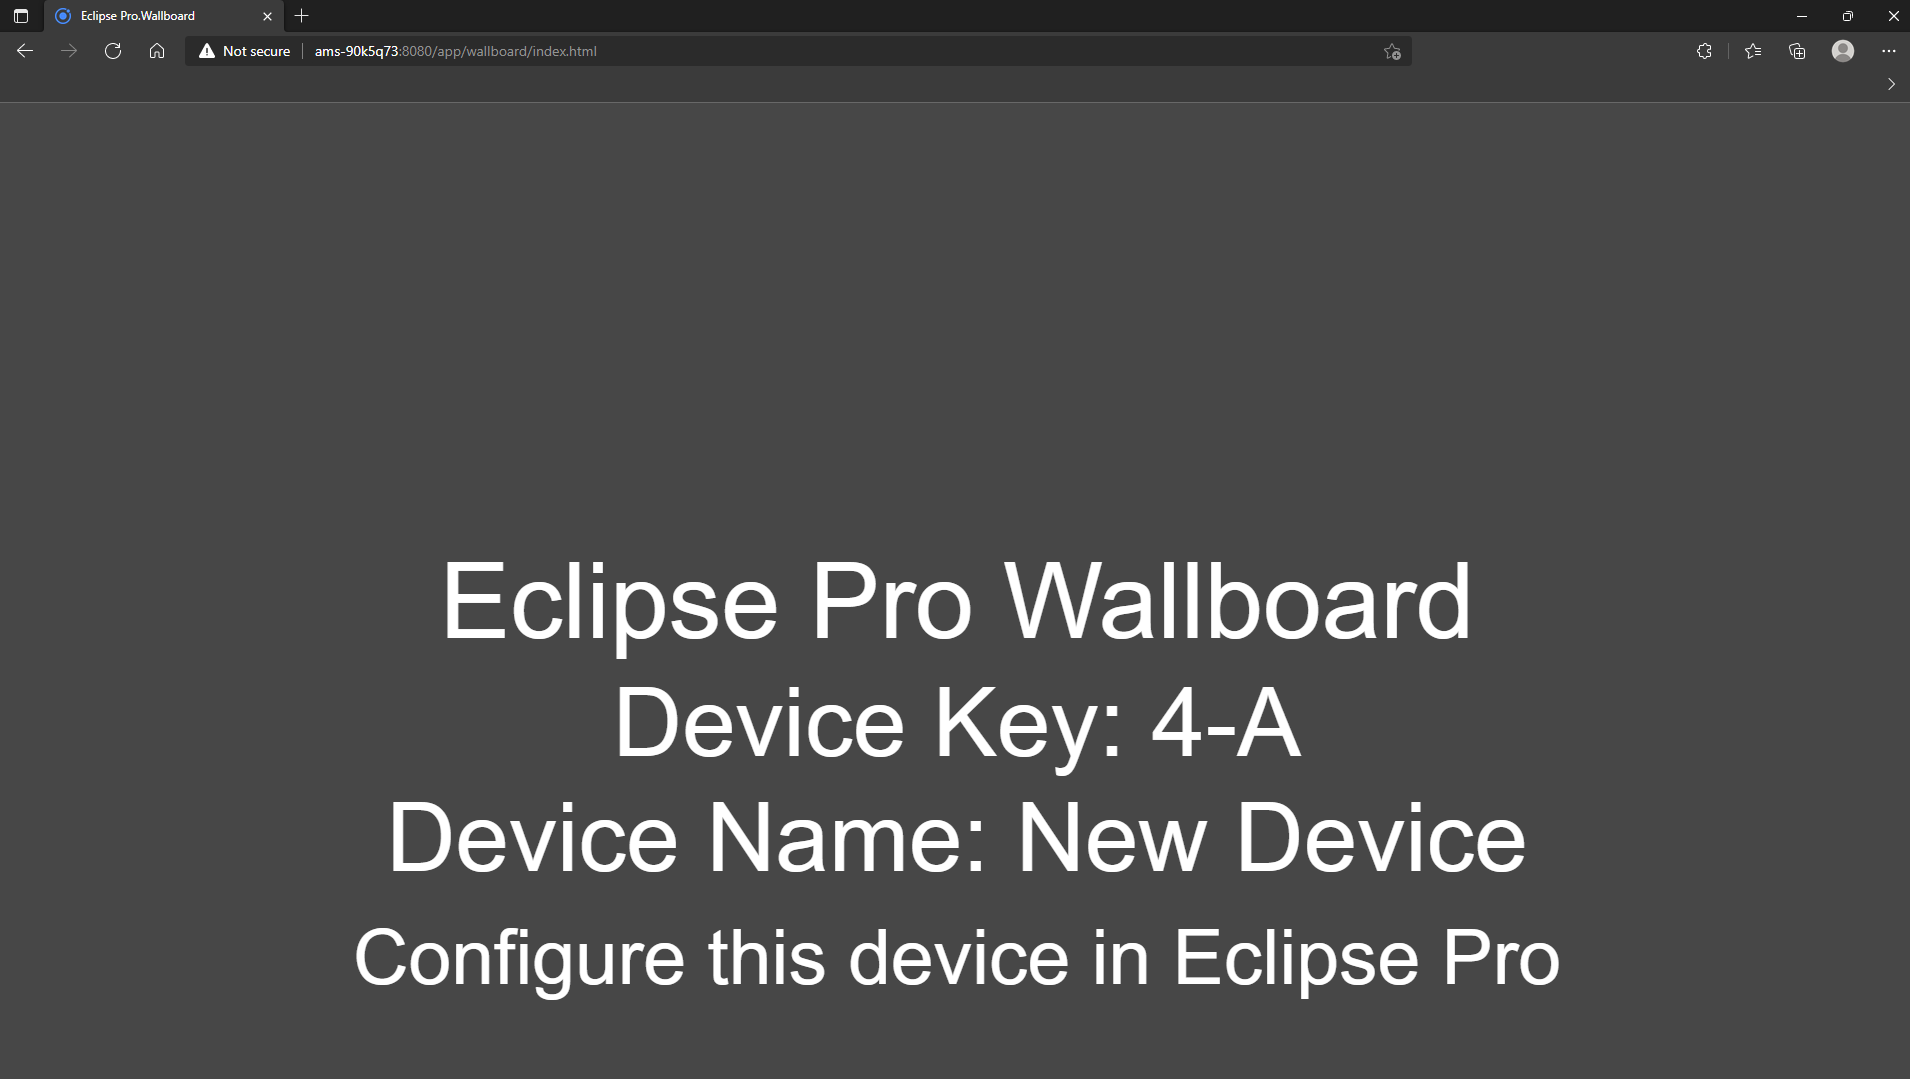
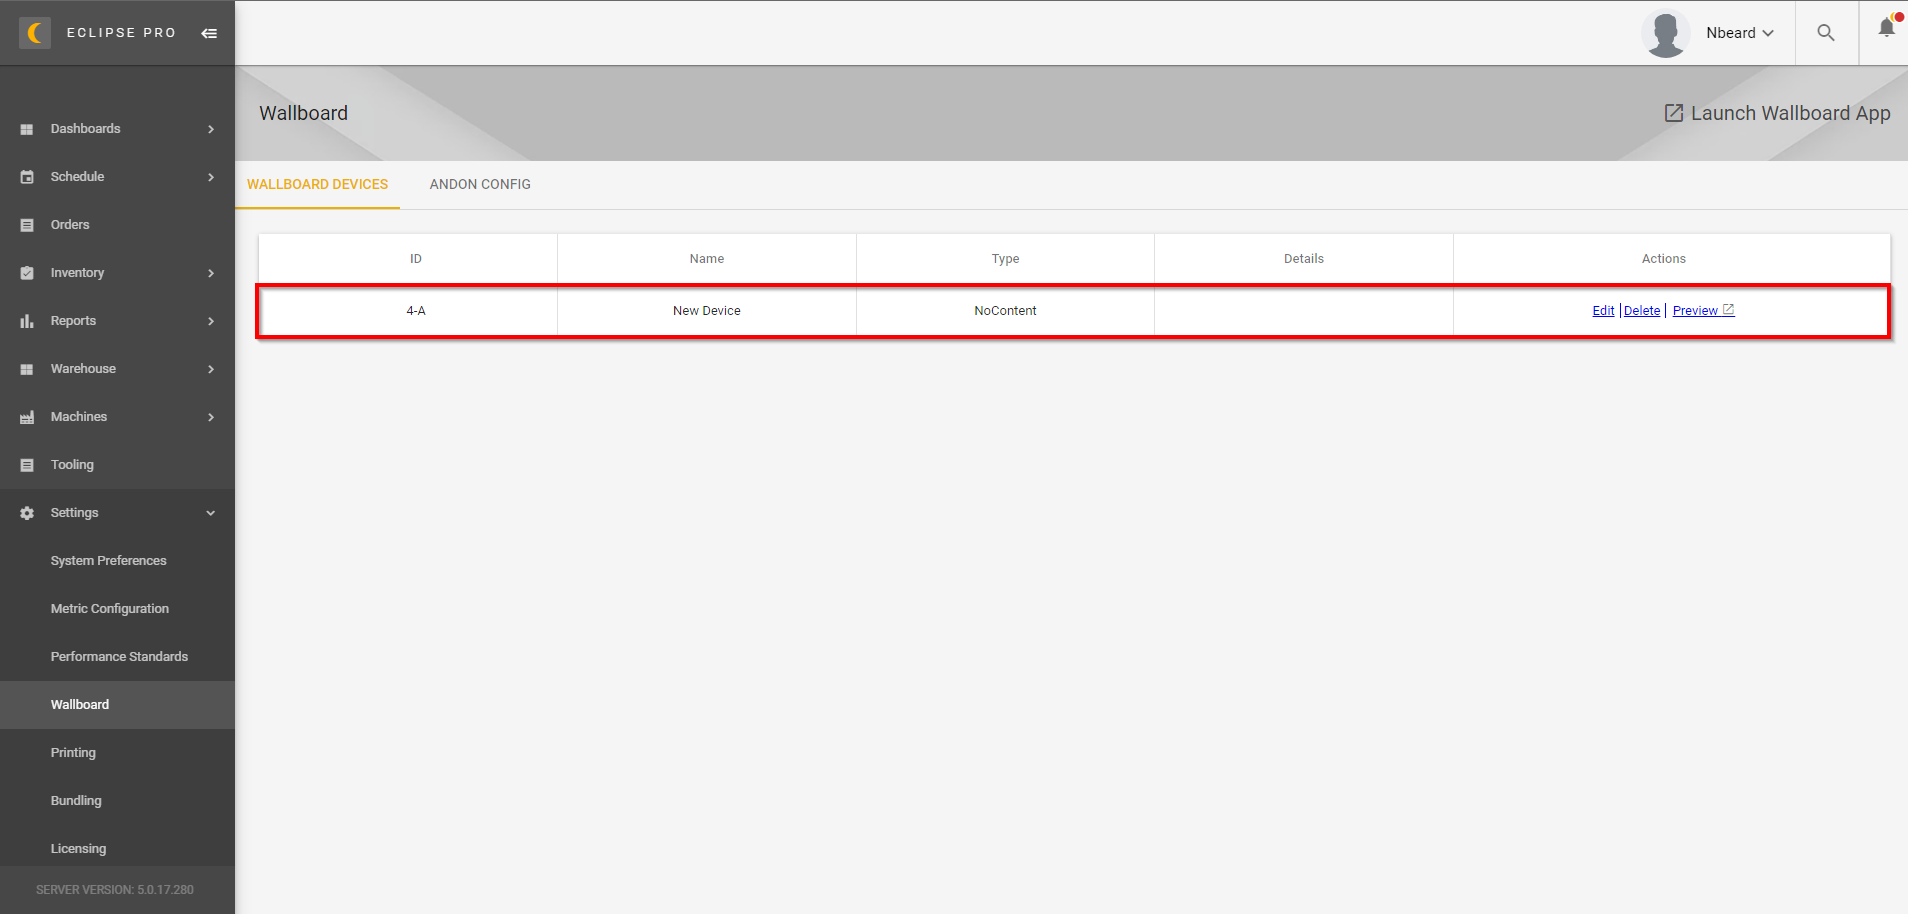
If your remote device has successfully connected to your Eclipse Pro wallboard, you will see the device listed under the Eclipse Pro Wallboard Devices.
Step 2 – Create a rotation of data you would like displayed
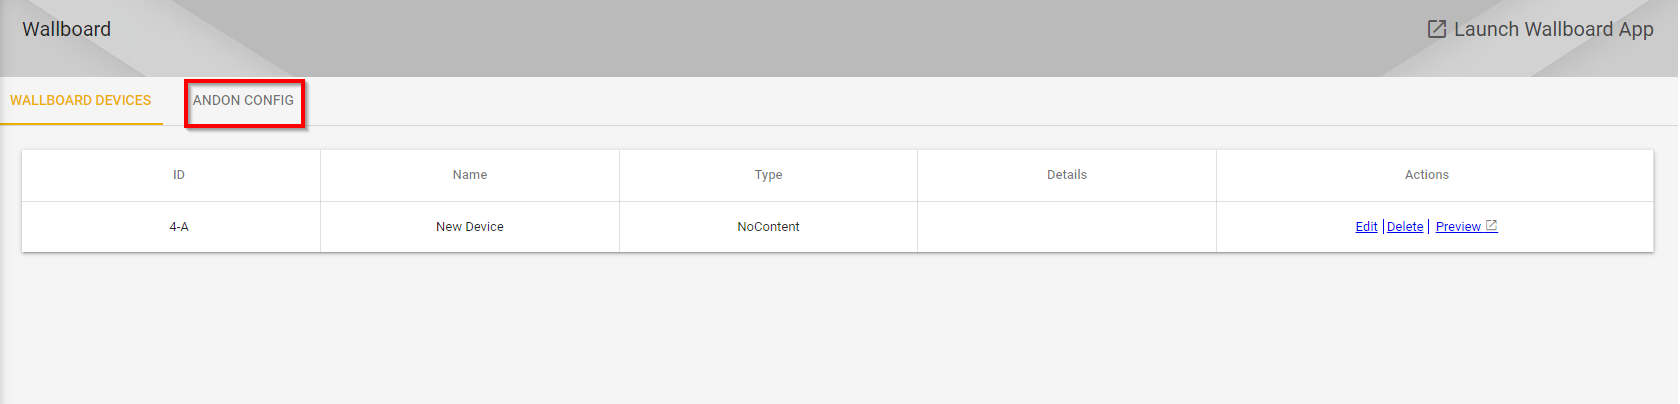
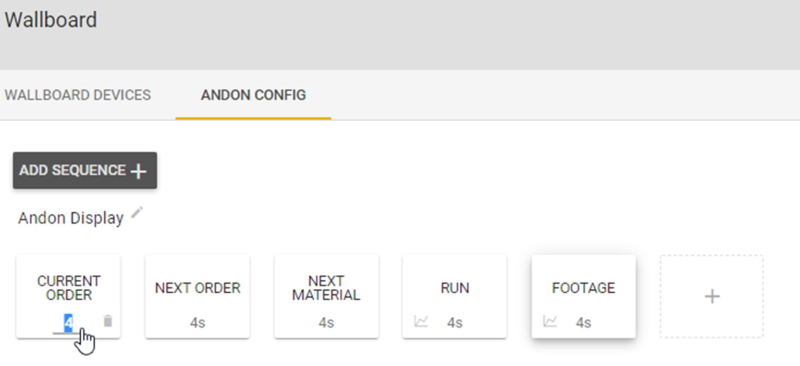
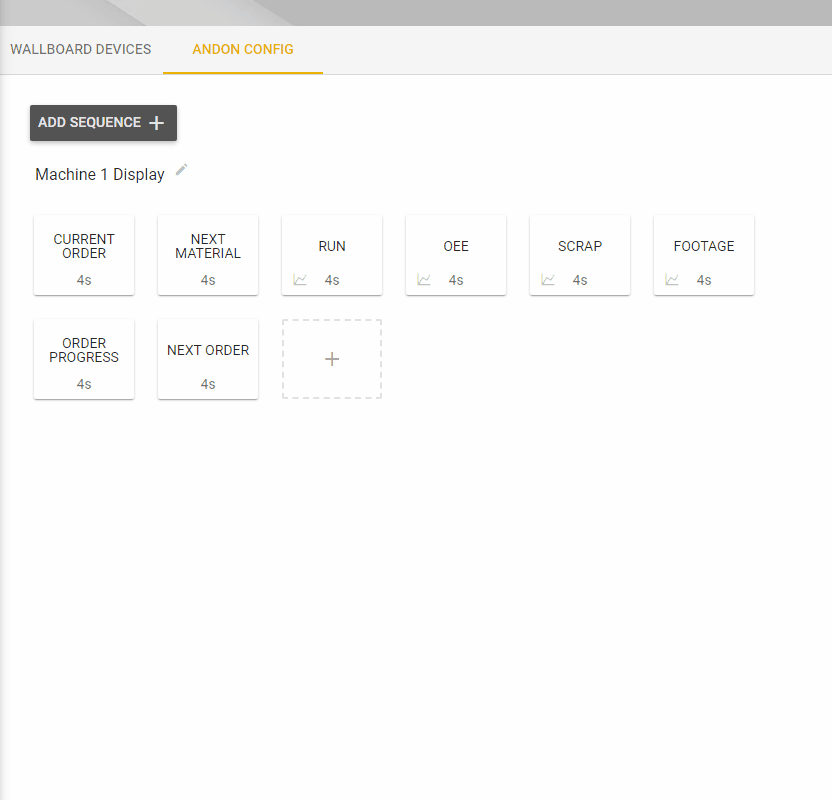
There are two options at the top of the Wallboard window, one for Wallboard Devices and another for Andon Config. To configure what you would like displayed on your remote device, you will need to set up a view sequence within the Andon configuration.
Within the Andon Config, you can add a Sequence by selecting “Add Sequence +”. A new sequence will generate with the default views.

Each Sequence is highly customizable. For starters, you can rename your Sequence.

Change the display order of the views by dragging the Andon views left or right.
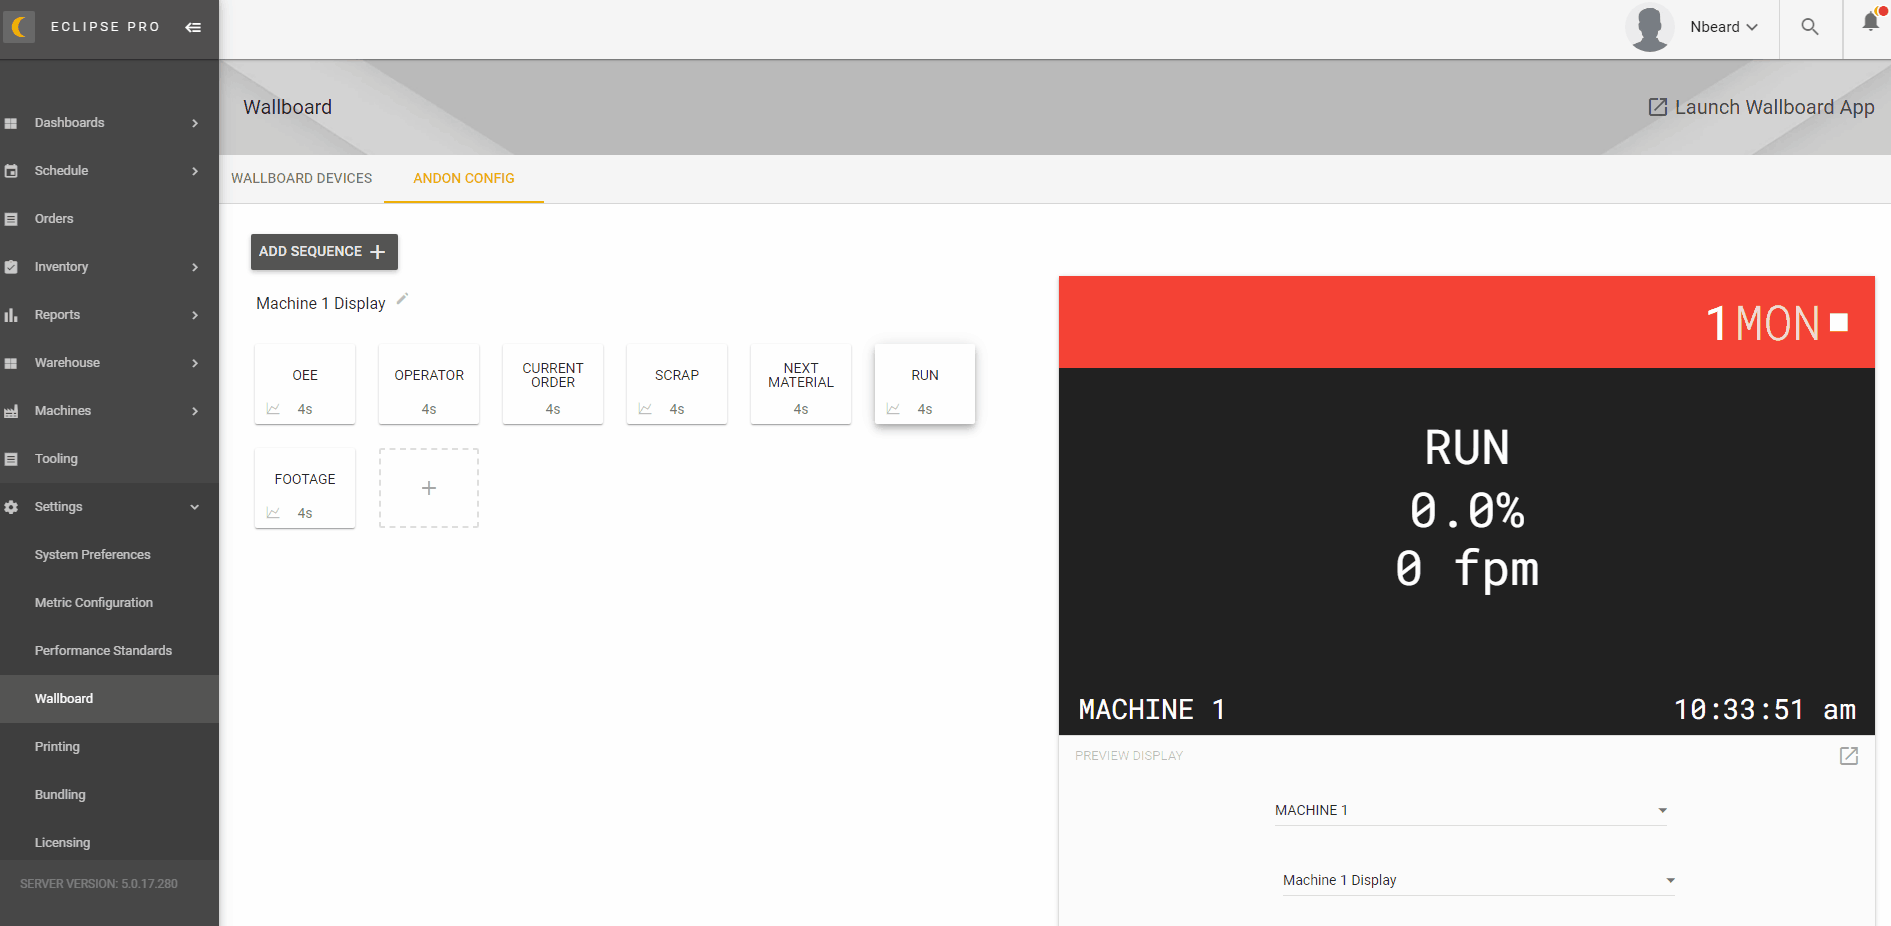
Remove and add specific Andon views.

Change the duration of seconds that each view appears. All changes can be previewed firsthand from within the previewer to the right of the sequence.
You also have the ability to add multiple different Andon sequences. There is no limit to the number of custom sequences you can create.
Step 3 – Assign the display to your Wallboard Device
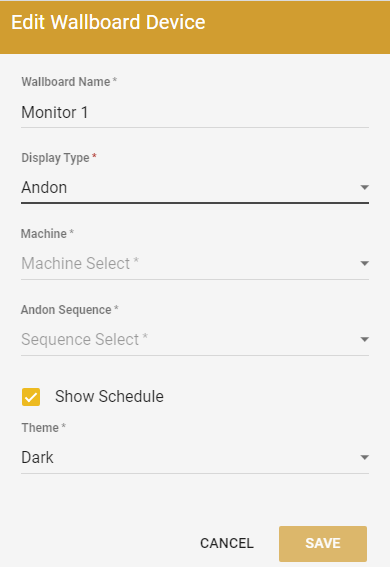
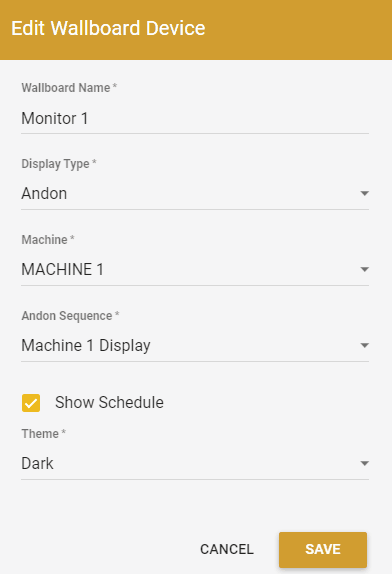
Once you have your Andon sequence customized to your liking, the next step will be to assign the display to your Wallboard device. To do this, you will need to first navigate back to Wallboard Devices and then select “Edit.”

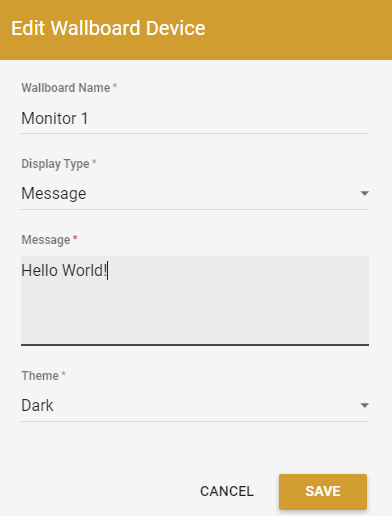
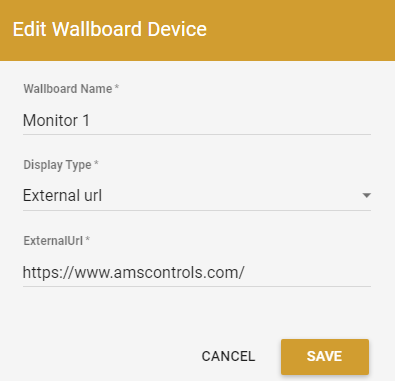
For easier tracking, you can rename your device.
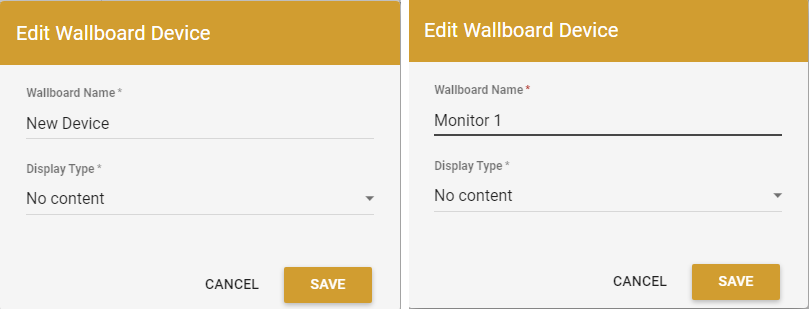
Under Display Type, you are given four different options, no content, Andon, Message, and External URL.
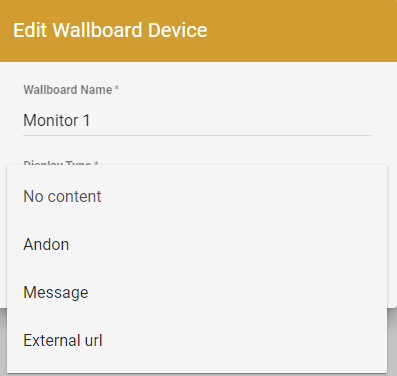
No Content – Displays the Device Key as shown in Step 1.
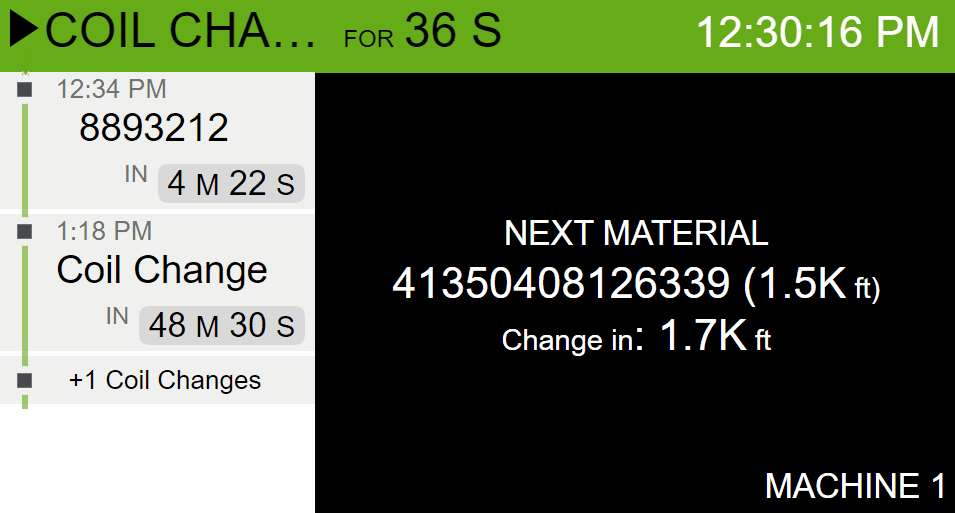
Andon – Allows you to specify the Machine and Andon Sequence to display for the specified Machine.
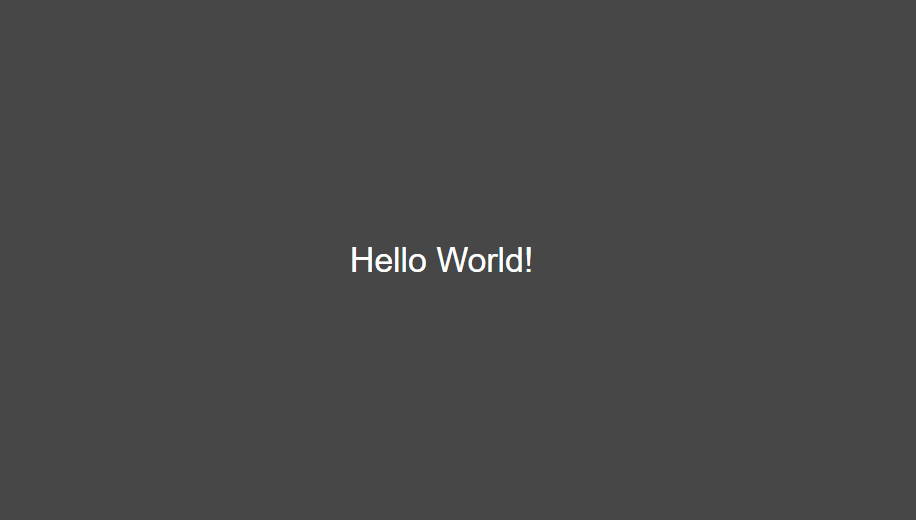
Message – Creates your own custom message and displays it directly to your Wallboard Device.
External URL – Displays any specified URL directly to your Wallboard Device.

Repeat steps 1-3 for any additional devices you would like to add to the Wallboard.
FAQ
Why does my Wallboard option within Eclipse have a lock? I cannot open the Wallboard feature within Eclipse Pro.
- Depending on your Eclipse Pro license, you may not have the Wallboard feature included. If you are unsure about your current licensing solution or interested in adding the Wallboard feature to your Eclipse Pro license please reach out to our sales team for more information.
When I navigate to my Eclipse Pro wallboard URL to add my device I am getting an error that my server refused to connect.
- Your device may be unable to reach the server on the network, don’t forget to check in with your IT team to ensure that your device is on the same network and can communicate with the Eclipse Pro server.
- You may have the wrong computer name listed in your Eclipse Pro URL.
- If you are certain of your network settings and the Wallboard URL, your Eclipse Pro Server services could be stopped. Verify that the AMS Eclipse Pro Server service has a running status. For further troubleshooting please reach out to support team at support@amcontrols.com.
